Category: Reverse Engineering Points: 300 Solves: Description:
Random as F*!@
This challenge was a great example of the power of symbolic execution. Start as usual with determining what type of file it is:
$ file pseudorandom_bin
pseudorandom_bin: ELF 64-bit LSB executable, x86-64, version 1 (SYSV), dynamically linked (uses shared libs), for GNU/Linux 2.6.24, BuildID[sha1]=5a0f467ef94ee8fa770ecda91c4326f00b2c6c30, stripped
Nothing terribly interesting in the strings of the binary. Let's give it a run.
$ ./pseudorandom_bin
I will generate some random numbers.
If you can give me those numbers, you will be $$rewarded$$
hmm..thinking...OK. I am Ready. Enter Numbers.
12345
Nope. That is not what I am expecting!!
It's looking for integer numbers that are equal to what it's expecting. Seems simple enough. Sadly there was no easy compare operator visible in the ltrace. Looks like we need to open it up.
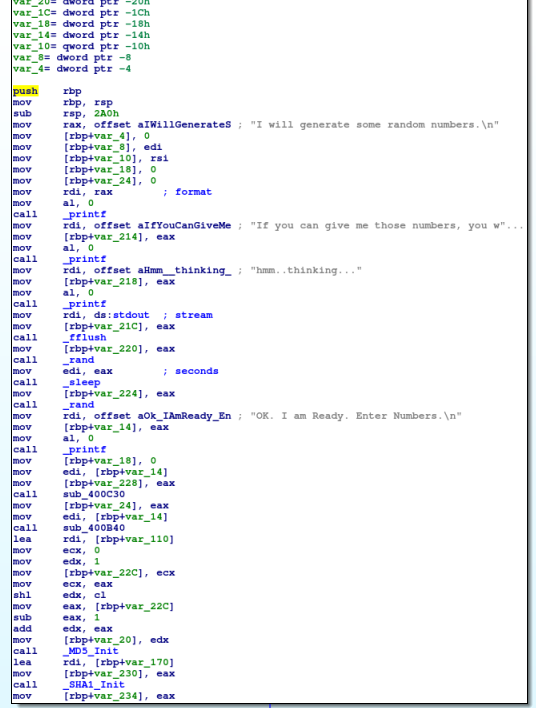
In the first part of the binary, it's easiest to look at the calls being made to understand the program. We're outputting text to the screen, however notice that we're calling rand. The rand function is used to generate random numbers. However, proper use of this call requires the developer to seed the random generator. This is important because the generator is really pseudorandom and without a random seed, you will always get the same numbers out. Indeed, weak pseudorandom numbers (not fully random seed values) are a common problem in cryptography.
There are a few function calls in the setup, however they do not involve my input to the program so I'm less concerned about what they do. Also note that there is a superfluous sleep call in there based on the "random" number. There's another further down right before we win. Let's take a second to patch those irritating bits out.
You can use whatever you want to patch them. I used IDA. However, note that IDA really isn't made for this sort of thing. It has the ability to do so, but it's not very good and involves more work than it should. The first thing to know is that to patch in IDA, the best way in my opinion is to do it at the Byte level. This means you need to know what the bytes are that a sleep call would be. If you search google for online x64 assembler, you'll find many options. I went with https://defuse.ca/online-x86-assembler.htm just because it was the first on the list. Just enter "call sleep" and select x64 architecture and click the submit button. You'll see the following:
0: e8 00 00 00 00 call 5 <_main+0x5>
Note that the e8 represents the "far call" opcode in x64 and all the zeros after it would actually be the address if this was a compiled program (i.e.: NOT actually zeros in the program). With this in mind, we click the sleep call and go to edit -> patch program -> change bytes. Again, this is really more of a limitation of IDA as a binary patching tool, but we're doing this in bytes rather than assembly. Here's what it looks like:
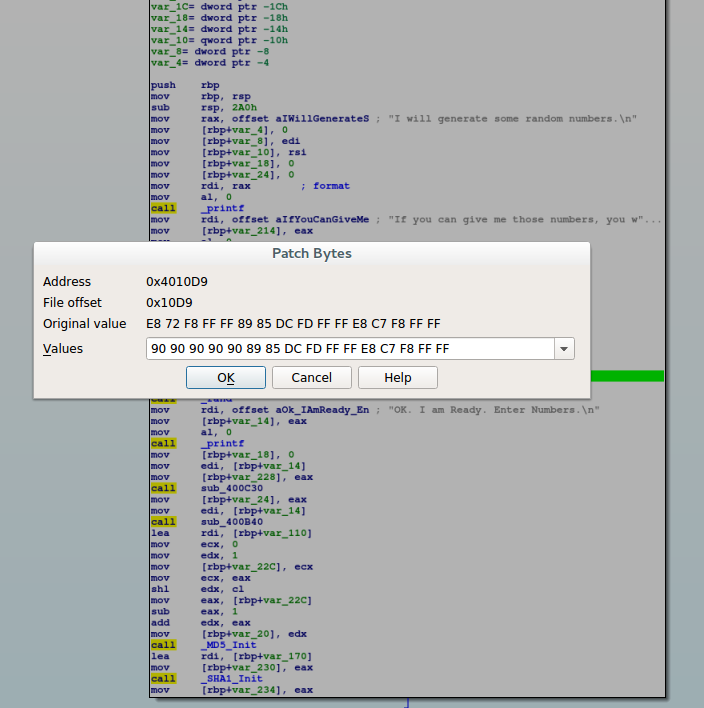
Note the \x90 I'm replacing bytes with is a "No Operation" or "NOP" in intel language. This just basically tells the processor to do nothing and continue to the next opcode. After the patch, our binary looks like this:
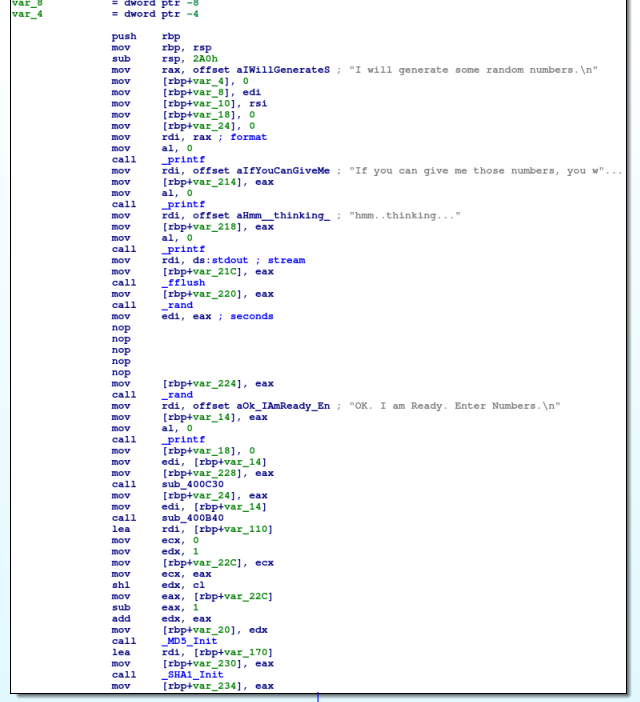
We do this for both sleep calls as I don't like wasting time! :-) Now, let's take a look at the more interesting section.
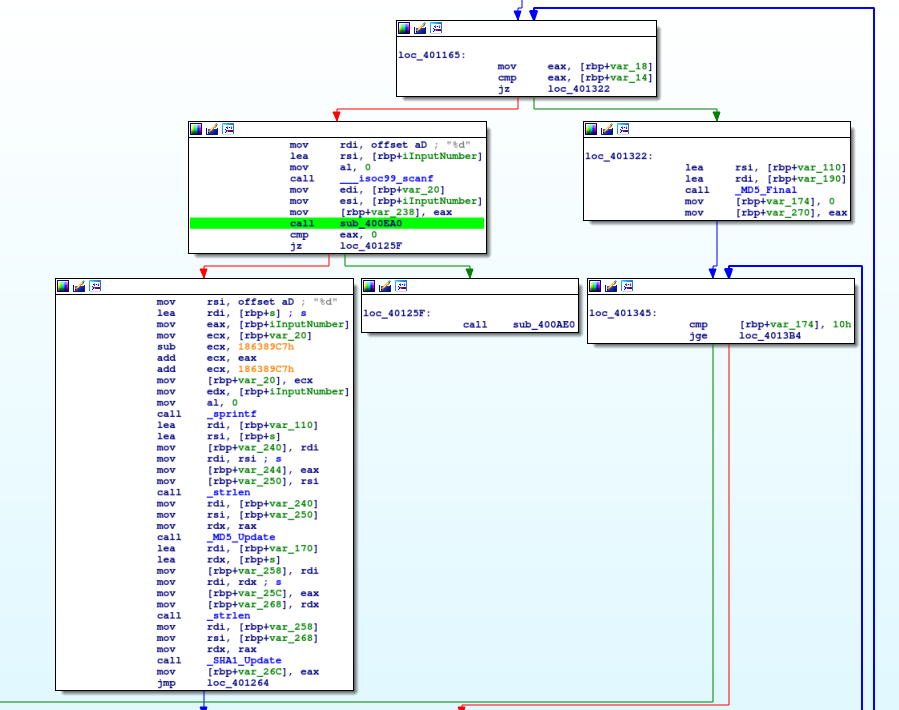
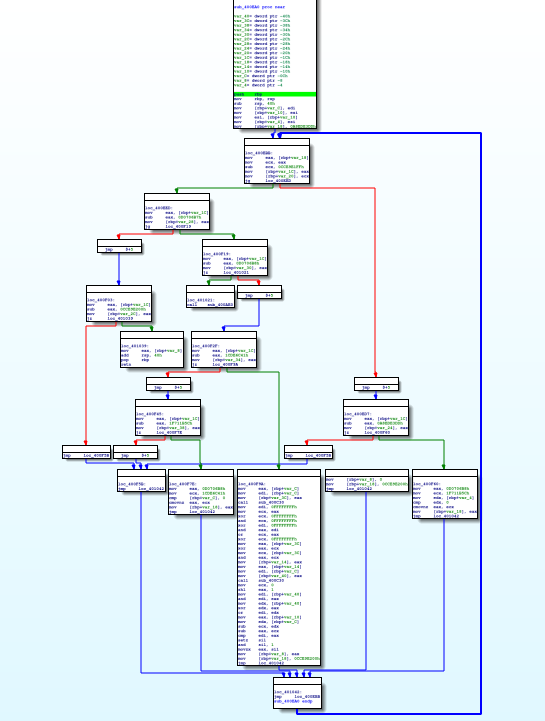
As in the ZorroPub binary, we're looking for an integer here. We're getting this by calling scanf . Then, we feed this and another value into sub_400EA0. How do we know that we're feeding these two values? Note that directly prior to the call we move these into the esi and edi registers. By convention, those are used as the second and first argument registers respectively. The function does something and returns a value to eax. If the returned value is 0 we have failed. So basically, we want it to be a non-zero value. Let's see what sub_400EA0 is:
Here we have a choice. We can attempt to crack this in three (or more) different ways:
Static Analysis: With static analysis techniques, we can manually run through this section of code. Perhaps we create our own python script to understand what it's doing. We use our own intellect to determine what the correct answer will be.
Dynamic Analysis: With dynamic analysis, we could simply run all possibilities through this section of code and brute force out what works and what doesn't. This isn't a terrible option as given a good horse power machine it's probably doable.
Symbolic Analysis: With symbolic analysis we can use equations to auto generate the correct answer. We can utilize theorem provers and other advanced concepts to break the search space for us. I chose symbolic analysis because it was also a way to reinforce my understanding of the concept as well as UCSB's angr tool. If you've never checked it out, I'd highly recommend taking a look at it.
With symbolic execution, determining what happens inside this function is as easy as asking angr. Here's how we ask it politely to do this for us. I am assuming in this that you already have angr set up and good to go.
Open an ipython environment and import angr. While we're at it, we'll do the common project loading as well:
In [1]: import angr
In [2]: proj = angr.Project("pseudorandom_bin")
Next, we need to tell angr to start processing at this function that we're talking about. We previously identified that the location of this function is 0x400EA0. So let's tell angr that.
In [3]: state = proj.factory.blank_state(addr=0x400EA0)
Now here we do need a little dynamic analysis. This is because we know there is a second argument to this function, but statically we're not sure what it is. If you set a break point at this function and run the program, you will discover that the value it is being fed is 0xFFFF. Tell angr about that.
In [4]: state.regs.rdi = 0xffff
We also know that our value is a signed integer. We can cut down on some of the work angr will have to do by telling it the maximum value that this input can be. Note that this is adding a constraint to the constraint solver:
In [5]: state.se.add(state.regs.rsi <= 0x7fffffff)
We're just about ready now. We create what's called a "Path Group". This construct built in to angr as a means of keeping track of paths. Too complicated to get into here, but the point is that it will allow angr to walk through the function.
In [6]: pg = proj.factory.path_group(state,immutable=False)
A quick manual inspection of the function tells us that it returns in block "0x401039". Similarly, if it fails, it goes to address "0x400AE0". This means we want to find our way to the first address while avoiding the second one. This command will kick off angr's exploration features and do the heavy lifting for us.
In [7]: pg.explore(find=(0x401039),avoid=(0x400AE0))
Out[7]: <PathGroup with 18 pruned, 3 avoid, 1 found>
On my underpowered virtual machine, this usually returns in about a minute. During this time, angr is simulating execution of the function as we have told it but using variables instead of values. Once it's done, we can see that it found 1 path (good!). The avoid and pruned basically mean those paths didn't work out either due to hitting our avoided address or otherwise.
Through static analysis of this function, we know that the return value is stored at rbp-0x8. Therefore, we ask angr what constraints does it know about for our return value:
In [8]: s = pg.found[0].state.copy()
In [9]: s.memory.load(s.regs.rbp-0x8,4)
Out[9]: <BV32 Reverse(0x0#31 .. (if (reg_40_0_64[31:0] == 0x8000) then 1 else 0))>
Easy as that. angr is telling us that the only value that will return 1 is 0x8000. All other values return 0. Also, we now know that this is a boolean function and it will not return any values other than 1 and 0. Super neat!
Using this value as input into the function, we can see that the program accepts it as accurate. The rest of this problem can be done exactly the same way of just determining the proper rdi value to run the simulation on. However, after a couple runs you will discover it's a pattern of value = previous value * 2. It does cycle around but it's just the same checks over and over. Once you give it the correct input, you get the flag:
nullcon{50_5tup1d_ch4113ng3_f0r_e1i73er_71k3-y0u}
Note that I believe it's possible to have solved this in one single angr run with no user interaction at all. However, I was running this on a VM with limited RAM and not so great CPU. If you had a beefier machine (as ShellPhish does) you could simply set it up and leave it run. That said, my guess is it would take a few hours of computation to give you the answer. Mine involves a bit of human interaction but is much faster.